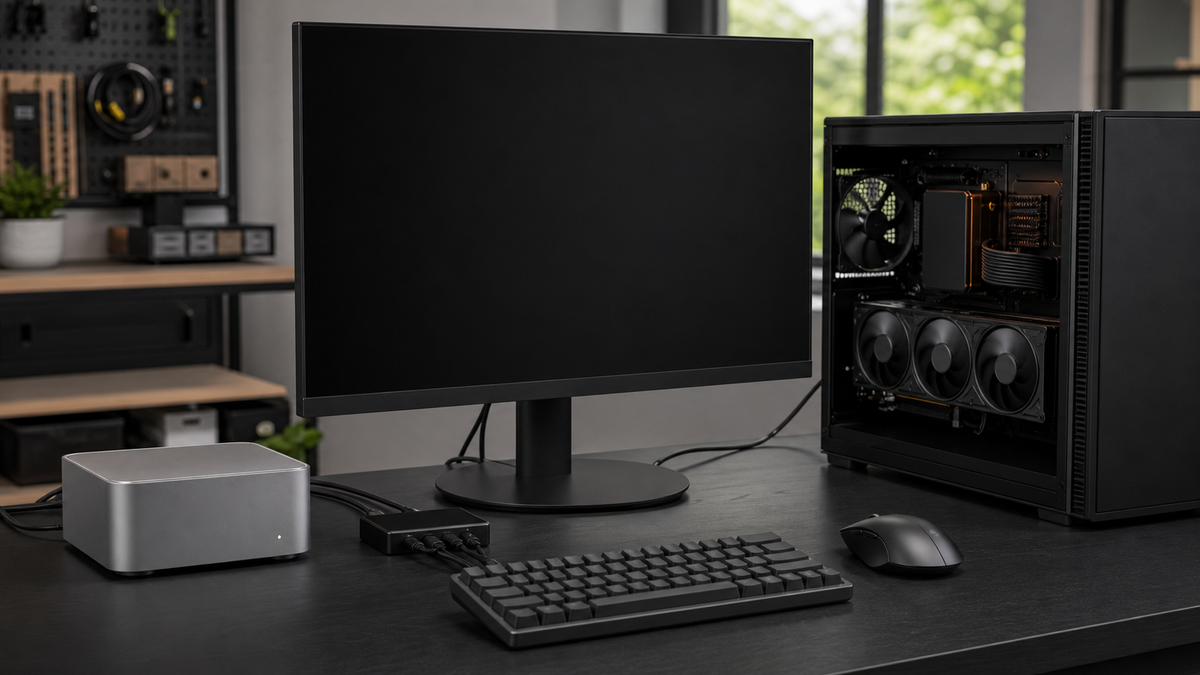
The local AI desk usually starts clean. A Mac Mini handles daily work, notes, files, and light MLX tests. An RTX workstation handles CUDA, ComfyUI, local image jobs, long inference runs, and the loud work you do not want on the compact machine. One monitor sits in the middle. One keyboard. One mouse. Maybe one webcam. Maybe an audio interface. For the first week, swapping cables feels harmless.
Then the cable routine becomes the workflow.
The RTX box is on DisplayPort because that is the only path that gives the monitor its full refresh rate. The Mac wants Thunderbolt or HDMI. The keyboard receiver works on one machine but sleeps strangely on the other. The monitor has a built-in KVM, but only if the USB upstream cable is paired with the right video input. The webcam is plugged into the wrong side of the desk. A ComfyUI job finishes, you switch inputs, and now the mouse is still controlling the other computer.
A KVM plan is not glamorous local AI infrastructure. It is desk friction control. If you use two machines every day, the switching path should be boring, predictable, and documented before the lab grows around it.
Affiliate disclosure: TokenByte may earn a commission if you buy through future gear links. This guide is based on researched specifications and practical setup design, not paid placement.
Use this alongside the Mac Mini local AI guide, the Build Picker, the ComfyUI GPU guide, the Recommended Gear, and the How We Test standard. TokenByte has not measured KVM latency, color behavior, USB stability, or monitor wake reliability for this article. Treat the hardware notes as researched buying context, then test your exact monitor, cables, and machines before making the desk permanent.
A desk KVM is not the same as a remote console
The recent remote-console problem is about recovery when a headless workstation needs BIOS access, boot-screen visibility, or power control from another room. A desk KVM is different.
This guide is about everyday local use:
- one monitor
- one keyboard and mouse
- two active computers
- fast input switching
- shared USB peripherals
- predictable display modes
- less cable swapping
If the RTX workstation lives in a closet, start with a KVM-over-IP recovery plan. If it sits at the desk beside a Mac Mini, start with the daily switching plan. Serious labs often need both, but they solve different annoyances.
The trap is buying the wrong one first. A cheap HDMI switch can move video but leave USB behind. A USB switch can share keyboard and mouse but do nothing for display input. A monitor KVM can be elegant but limited to two computers, specific upstream wiring, or a lower refresh path. A high-end DisplayPort KVM can keep the gaming monitor happy but may not give a Mac Mini the neat one-cable setup you imagined.
Start with the workflow, not the box.
Write down the machines and the monitor before shopping
For a Mac Mini plus RTX workstation desk, the useful worksheet is short:
Machine 1: Mac Mini
Video outputs used:
USB role:
Power needs:

Machine 2: RTX workstation
Video outputs used:
USB role:
Power needs:

Monitor:
Resolution:
Refresh rate:
Inputs:
Built-in USB hub:
Built-in KVM:

Shared devices:
Keyboard:
Mouse:
Webcam:
Audio:
External drives:
Capture card:
Fill that out before reading reviews. If the monitor is 4K at 60 Hz, many KVM options are plausible. If it is 4K at 144 Hz, 4K at 240 Hz, 5K, 6K, ultrawide, or HDR-sensitive, the video path becomes the hard part. If you need to share a fast external SSD or capture device, USB bandwidth matters too.
Do not assume "USB-C" means the same thing on every device. It may carry data only, DisplayPort Alt Mode, USB4, Thunderbolt, power delivery, or some combination. The connector shape is not the spec.
Apple's current Mac Mini specifications make that visible. The M4 Mac Mini has three Thunderbolt 4 ports with USB4 up to 40 Gb/s and DisplayPort support, plus HDMI. The M4 Pro model moves to Thunderbolt 5 with support up to 120 Gb/s, plus HDMI. Apple's display guide says the M4 Mac Mini can run up to three displays in specific combinations, including two displays where one can be up to 8K at 60 Hz or 4K at 240 Hz over Thunderbolt or HDMI. The M4 Pro guide lists broader external-display combinations, including three displays up to 6K at 60 Hz or two displays with one up to 8K at 60 Hz or 4K at 240 Hz.
Those are host capabilities. They do not mean your KVM, cable, monitor input, USB-C dock, or adapter chain can carry the same mode.
Pick the switching pattern
There are four practical KVM patterns for this desk.
Pattern 1: Monitor built-in KVM
This is the cleanest if your monitor supports it well. The monitor takes video from both machines and switches USB keyboard/mouse control with the active input.
Dell's KVM setup guide explains the basic shape: connect each computer to the monitor for video, then connect USB upstream cables so the monitor's downstream keyboard and mouse ports know which computer to control. Dell also notes that KVM support is model-specific, Auto KVM exists on select models, and Bluetooth keyboards and mice are not supported through that KVM path.
BenQ's monitor KVM setup FAQ describes the same concept from another angle: connect USB peripherals to the monitor, connect at least two video sources, and pair HDMI or DisplayPort sources with the right USB upstream connection when needed.
The built-in monitor KVM is a strong fit when:
- the monitor already has enough inputs
- both machines can use supported display modes
- you only need two computers
- keyboard and mouse are the main shared devices
- you want fewer boxes on the desk
The weakness is that the monitor decides the rules. Some models handle KVM switching smoothly. Some need menu digging. Some share only basic USB devices. Some do not like webcams, audio gear, or storage devices. Some are excellent for office work but not for high-refresh RTX output.
If you buy a monitor partly for its KVM, read the manual before buying, not after unboxing.
Pattern 2: USB switch plus monitor input switching
This is the cheapest reliable pattern for many AI desks.
The monitor handles video input switching. A separate USB switch shares keyboard, mouse, and maybe a few low-risk peripherals. You press one button on the monitor or use the monitor input shortcut, then press one button on the USB switch.
It sounds less elegant than a full KVM, but it avoids many video compromises. The RTX workstation can stay on DisplayPort at the monitor's best mode. The Mac Mini can use HDMI or Thunderbolt-to-DisplayPort. USB switching stays simple.
Use this pattern when the monitor video path matters more than one-button perfection. It is especially practical if the shared USB set is just keyboard, mouse, and a webcam.
Be careful with storage. Sharing an external SSD through a USB switch is not the same as sharing a keyboard. A drive mounted on macOS should be ejected before switching away. A Windows or Linux machine can also dislike a sudden USB storage disappearance. For local AI work, keep active model drives, scratch drives, and dataset drives attached to the machine that is using them. Share human-interface devices, not critical live storage.
Pattern 3: External full KVM
A full KVM switches video and USB together. This is the traditional answer, and it can be the right one if the specs match the monitor.
Cable Matters lists USB-C and USB/video KVM products that cover common office setups, including USB switches with 5 Gb/s or 10 Gb/s USB paths and USB-C KVM models with display support. Its USB-C KVM page for two laptops and one HDMI monitor lists 4K at 60 Hz HDMI video, 100 W charging to one laptop or up to 85 W each with two connected laptops, 10 Gb/s USB ports, and a warning that both connected systems need USB-C or Thunderbolt ports that support DisplayPort Alt Mode for video. It also says the PD charging design is for compatible laptops, not powering mini PCs or desktops.
That last sentence matters for a Mac Mini and RTX workstation. A laptop-oriented USB-C KVM may be a poor fit for a desktop GPU box. The RTX workstation probably wants direct DisplayPort or HDMI from the GPU, and it already has its own power supply. The Mac Mini also has its own power cable. Do not pay for a laptop charging workflow you do not need.
Level1Techs' DisplayPort 1.4 KVM page is a useful example of the other end of the market. The single-monitor four-computer model lists DisplayPort 1.4 inputs, 4K at 120 Hz or 8K at 30 Hz support, Display Stream Compression support, HDCP pass-through, USB 3.0 and USB 2.0 ports, and an EDID engine that lets computers know when the port is inactive. That is the kind of spec sheet to read when high-refresh DisplayPort is the hard requirement.
The catch is price and fit. A serious DisplayPort KVM can cost more than a basic monitor. That may be worth it if the desk is used every day. It is probably wasteful if you only switch once a week.
Pattern 4: Two monitors, no KVM
Sometimes the best KVM is no KVM.
Put the Mac Mini on a compact 4K or 5K productivity display. Put the RTX workstation on the high-refresh or HDR monitor. Use separate keyboard and mouse paths, or use a small USB switch only for the keyboard and mouse.
This costs more desk space, but it avoids the worst compatibility problems. It also helps if the RTX workstation is often running a long job while the Mac Mini remains the writing, browsing, and control machine.
For some local AI desks, two monitors are less expensive than one premium KVM and weeks of annoyance.
The display path sets the budget
The most common KVM mistake is buying for the ports on the back, then discovering the monitor mode is not actually supported.
HDMI Licensing's current HDMI 2.2 bandwidth overview points to a 96 Gb/s ceiling and higher future resolution targets, which is a useful reminder that "HDMI" by itself is not precise enough. A KVM advertised for ordinary HDMI office use may not be the same thing as a KVM that preserves a high-refresh GPU path. USB-IF's USB4 overview says USB4 can use a high-speed link for data and display protocols, supports up to 80 Gb/s operation over 80 Gb/s certified cables, and scales to the best mutual capability of connected devices.
That "mutual capability" idea is the part to remember. The chain only runs at the level all pieces support:
- GPU output
- Mac output
- cable
- adapter
- KVM or monitor hub
- monitor input
- operating system display setting
If one piece is 4K at 60 Hz only, the chain is 4K at 60 Hz. If one cable is marginal, the chain is unstable. If the KVM supports 4K at 120 Hz only under DisplayPort but the Mac is connected through a weak USB-C adapter, the spec sheet will not save you.
For an RTX AI workstation, decide whether the high-refresh path actually matters. A ComfyUI box does not need 240 Hz to generate images. A workstation that also does gaming, video editing, or daily desktop work might. Do not spend for a high-refresh KVM if the monitor is mostly a control surface for jobs.
EDID and wake behavior are not optional details
EDID is the display information a monitor reports to a computer: supported resolutions, refresh rates, audio, color modes, and related details. KVMs and docks can change how that information appears.
Bad EDID behavior shows up as annoying little failures:
- windows move after switching inputs
- the Mac forgets the monitor arrangement
- the RTX box drops to a fallback resolution
- HDR settings reset
- the monitor wakes slowly
- a boot screen appears on the wrong output
- remote desktop sessions resize strangely
Some KVMs emulate a monitor so every computer thinks the display is still connected. Some pass EDID through. Some intentionally tell inactive computers the monitor is gone. Level1Techs' DisplayPort KVM page explicitly references an EDID engine and notes that monitor emulation may require a separate repeater for people who need it.
There is no universal best behavior. For a gaming desktop, you may want the inactive machine to know the monitor moved. For a Mac desktop with arranged windows, you may prefer steadier display identity. For a workstation that must show BIOS on the right port, boot behavior matters more than desktop neatness.
Test the boring cases:
- Cold boot each machine while the KVM is switched away.
- Wake each machine from sleep.
- Change monitor input and USB control separately.
- Reboot into firmware or boot menu if the machine supports it.
- Confirm the desired resolution and refresh rate after each switch.
If a KVM fails those tests, return it before you build the desk around it.
USB sharing should be conservative
Keyboard and mouse are easy. Everything else needs thought.
Wireless keyboard and mouse receivers usually work better through a KVM than Bluetooth devices because the computer sees the USB receiver. Dell's KVM guide specifically says Bluetooth-enabled keyboards and mice are not supported by the monitor KVM path. That does not mean Bluetooth cannot be used separately. It means the monitor cannot magically switch a Bluetooth pairing between computers as if it were a USB device.
Webcams can work, but not every monitor KVM or USB hub path supports them well. Dell's guide says the USB downstream port on its monitor KVM path does not support sharing a webcam. Other devices may, but check the device documentation and test video calls before depending on it.
Audio interfaces deserve their own caution. A USB audio interface disappearing mid-session can confuse recording software, monitoring paths, and system audio. If you use Studio One, OBS, Discord, or streaming tools, a shared audio interface through a switch may be more trouble than it is worth. Consider leaving audio on the Mac Mini and using the RTX box for compute, or use separate audio paths.
External SSDs are the biggest no. A KVM should not become the place where active model drives and training-data drives randomly detach. Local AI storage needs predictable mounts. Keep hot storage attached directly to the host machine or to a properly shared network volume, not to a button that can be bumped during a write.
Mac Mini plus RTX workstation: a sane first build
For most people, this is the first build I would test:
Mac Mini:
  HDMI or USB-C to monitor input 1
  USB upstream to monitor KVM, or USB cable to USB switch

RTX workstation:
  DisplayPort from GPU to monitor input 2
  USB upstream to monitor KVM, or USB cable to USB switch

Shared:
  keyboard receiver
  mouse receiver or wired mouse
  optional webcam only after testing

Not shared:
  model drive
  scratch drive
  dataset drive
  audio interface unless proven stable
If the monitor has a good built-in KVM and both video modes work, use it. If the monitor has great video inputs but a weak USB/KVM path, use a separate USB switch. If you need one-button switching and high-refresh DisplayPort, price a serious external KVM. If none of those feels clean, use two displays.
Keep the first version boring. The goal is to remove friction, not to create a desk full of adapters that only one person understands.
Buying guidance
Buy around the hardest requirement.
If the hard requirement is a clean Mac productivity desk, a monitor with a well-documented built-in KVM may be the best purchase. Check the monitor manual for upstream USB behavior, supported computer count, keyboard/mouse limitations, and whether switching can be done without menu diving.
If the hard requirement is the RTX monitor mode, keep the GPU directly connected to the monitor and use a USB switch first. This is the pragmatic path when you care about DisplayPort, high refresh, VRR, HDR, or avoiding another active video device.
If the hard requirement is one-button switching for a serious daily workstation pair, buy a real external KVM that explicitly supports the video mode, USB speed, number of hosts, and EDID behavior you need. Do not buy a laptop USB-C KVM for a desktop GPU workstation unless the documentation matches that exact wiring pattern.
If the hard requirement is reliability, buy from somewhere with a reasonable return window and test it hard during the first week. KVM compatibility problems are often specific to the exact monitor, GPU, Mac, cable, and sleep settings. A glowing review from another setup is not proof for yours.
For affiliate-ready gear pages later, the useful categories are:
- monitor with built-in KVM for Mac plus PC desks
- simple USB switch for keyboard and mouse
- DisplayPort 1.4 or HDMI 2.1 external KVM for high-refresh monitors
- full-featured USB-C or Thunderbolt cables
- short certified HDMI or DisplayPort cables
- label tags for the back of the desk
Skip miracle claims. The best KVM is not the most expensive one. It is the one that preserves the display mode you actually use, switches the devices you actually share, and does not randomly rearrange the desk when a machine wakes up.
A five-minute acceptance test
Before keeping the box, run this:
- Confirm both machines reach the monitor's intended resolution and refresh rate.
- Switch from Mac to RTX and back ten times.
- Sleep and wake the Mac while switched away.
- Reboot the RTX workstation while switched away.
- Check whether windows move or displays renumber.
- Test the keyboard and mouse at the login screen.
- Test the webcam only if you intend to share it.
- Eject any shared storage and remove it from the KVM plan.
- Label every cable after the test passes.
- Write down the switching sequence in one note.
That last step sounds silly until the first time someone else needs to use the desk. "Press monitor input, then USB switch button" is a lot easier to support than a nest of mystery cables.
The practical payoff
A good KVM plan makes a two-machine AI desk feel intentional.
The Mac Mini can stay the quiet control machine. The RTX workstation can stay the loud compute box. The monitor, keyboard, and mouse stop being a daily negotiation. ComfyUI jobs can run on the GPU machine while the Mac remains useful for writing prompts, checking logs, editing files, or publishing notes. When it is time to inspect the RTX desktop, you switch once and work.
Do not overbuild it on day one. Write down the video modes, decide what actually needs to be shared, keep storage direct, and test sleep, wake, reboot, and login behavior before trusting the setup.
Local AI labs get expensive when every annoyance turns into another hardware purchase. A desk KVM is worth buying only when it removes a repeated annoyance without creating a new one. Get that right, and the lab feels less like a pile of machines and more like one workspace with the right computer in focus.