Run Your Local AI Stack With Docker Without Making It Fragile
The first local AI box usually starts as a few commands in a terminal. Ollama gets installed. Open WebUI appears on a port. ComfyUI lives in a folder that made sense at the time. A model cache lands somewhere else. Then three weeks later you are afraid to reboot the machine because you are not sure what will come back.
Docker can fix that. It can also turn the same machine into a different kind of mess if every service is treated like a disposable demo container.
This guide is researched operating guidance, not a TokenByte benchmark report. TokenByte has not measured this exact stack across every GPU, driver, Linux distribution, or container image. The goal is simpler: make a home-lab AI box easier to understand, restart, update, back up, and unwind.
Affiliate disclosure: TokenByte may earn a commission when you buy through links on this site. That does not change the recommendation here: the best container plan is the one you can restore on a bad day, not the one with the most moving parts.
The rule: containerize the boring services first
Do not start by containerizing everything because Docker exists.
Start with the services that benefit most from a predictable wrapper:
- Open WebUI, because its Docker path is officially documented and it has persistent app data.
- Ollama, if you want model storage and API exposure to be explicit.
- Small support services, if you add them later.
Be more cautious with ComfyUI. The official ComfyUI installation documentation focuses on a manual local setup, and the project has enough custom-node, Python, CUDA, and model-path complexity that a sloppy container can make debugging harder. A careful ComfyUI container is possible, but a known-good host install is often the easier first step for a one-user home lab.
That split is not hypocrisy. It is discipline. Put the boring, web-facing, restartable pieces in Compose first. Keep the fast-changing creative tool where you can see it until your workflow settles.
If you are still choosing the physical box, pair this with the TokenByte build picker and ComfyUI GPU guide. Containers do not fix an undersized GPU, a full model drive, or a weak power plan.
Why Compose beats a notebook full of run commands
The Open WebUI docs show one-line docker run commands, and those are fine for a quick test. The problem is what happens after the test becomes your daily setup.
A one-line command hides decisions:
- Which port is exposed?
- Which volume holds the app database?
- Where are models stored?
- Which environment variables matter?
- Does the service restart after a reboot?
- What image tag did you actually run?
Docker Compose puts those decisions in one file. That file becomes part of the lab, like a wiring diagram. If the machine dies, the Compose file is easier to restore than a shell history entry from last month.
For a TokenByte-style home lab, the Compose file should live in a boring folder such as:
/srv/local-ai-stack/
  compose.yaml
  .env
  README-restore.md
Then back it up with your notes and workflows. The local AI backup plan matters here because the Compose file is now recovery documentation, not just deployment plumbing.
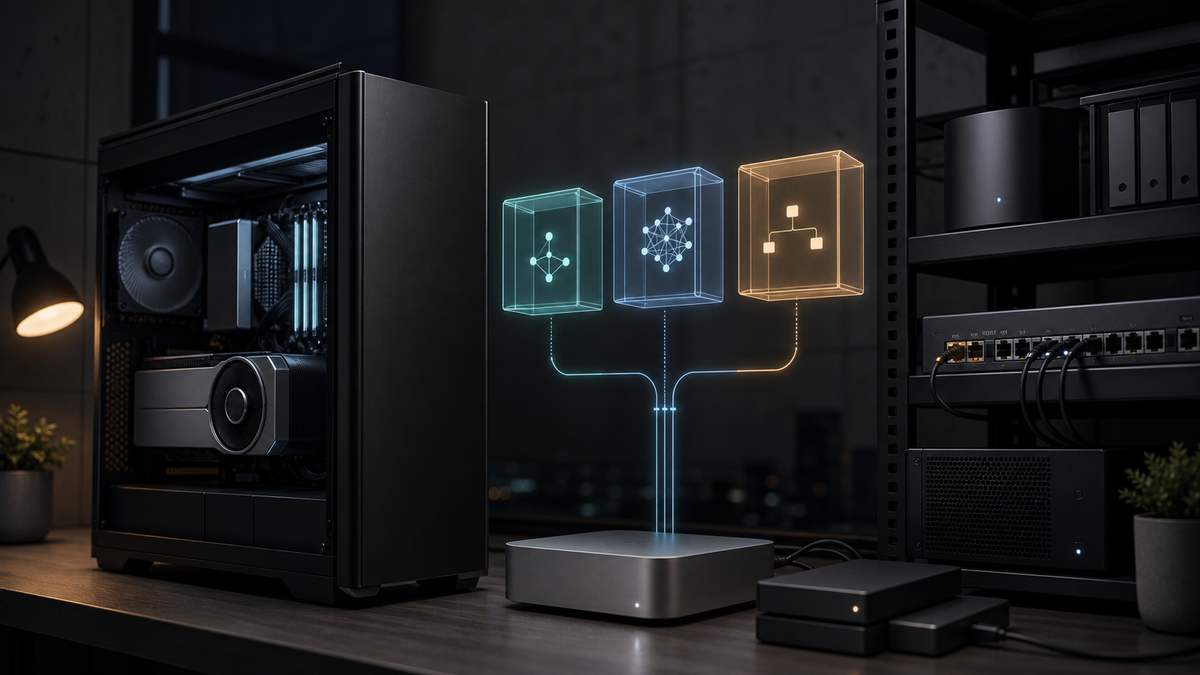
The minimum stack that makes sense
For many readers, the sensible first Compose stack is Ollama plus Open WebUI.
Ollama provides the local model API. Open WebUI provides the browser interface. The Open WebUI docs document Docker as the recommended path for most users, list its published container images, show persistent storage at /app/backend/data, and show version-pinned examples for production-style use. The Ollama Docker image is published on Docker Hub and is a natural fit when you want the model service to be managed like the rest of the stack.
Here is the shape I would start with, edited for readability:
services:
  ollama:
    image: ollama/ollama:latest
    container_name: ollama
    restart: unless-stopped
    ports:
      - "127.0.0.1:11434:11434"
    volumes:
      - /srv/local-ai-data/ollama:/root/.ollama
    deploy:
      resources:
        reservations:
          devices:
            - driver: nvidia
              count: all
              capabilities: [gpu]

  open-webui:
    image: ghcr.io/open-webui/open-webui:v0.9.6
    container_name: open-webui
    restart: unless-stopped
    depends_on:
      - ollama
    ports:
      - "127.0.0.1:3000:8080"
    environment:
      OLLAMA_BASE_URL: http://ollama:11434
      WEBUI_SECRET_KEY: ${WEBUI_SECRET_KEY}
    volumes:
      - /srv/local-ai-data/open-webui:/app/backend/data
Treat that as a pattern, not a blind copy-paste. Your GPU runtime, Linux distribution, Docker version, firewall, and storage layout still matter.
The important ideas are the durable parts:
- Use named service blocks.
- Keep persistent data outside the container.
- Bind web ports to localhost unless you deliberately expose them.
- Store secrets in an
.envfile that is protected and backed up appropriately. - Use restart policy only after you know the container starts cleanly.
The Open WebUI docs call out WEBUI_SECRET_KEY during updates because recreating a container without a persistent key can log users out. That is exactly the kind of small operational detail that belongs in the Compose file and restore notes.
GPU containers need the NVIDIA layer first
Do not debug Open WebUI, Ollama, or ComfyUI until the host can see the GPU cleanly.
On a Linux RTX box, that means the NVIDIA driver works first. Then Docker works. Then the NVIDIA Container Toolkit is configured. NVIDIA's Container Toolkit documentation is the source to follow for that layer, not a random forum paste from three driver generations ago.
A practical acceptance test is boring:
nvidia-smi works on the host
docker runs a simple container
a GPU-enabled container can see the NVIDIA device
Ollama starts
Open WebUI connects to Ollama
only then do you add real models and users
If you skip that order, every error looks like an app problem. Maybe it is the app. Maybe Docker cannot see the GPU. Maybe the host driver is broken. Maybe a previous service is holding VRAM. Work from the bottom up.
The how-we-test page is relevant even when you are not publishing benchmark charts. A useful lab note names the OS, driver, GPU, container image, model, storage path, and exact command. Future you will not remember.
Bind ports like you mean it
The fastest way to make a private local AI tool less private is to expose it casually.
For a single-machine setup, bind Open WebUI and Ollama to localhost first:
ports:
  - "127.0.0.1:3000:8080"
That makes the UI reachable from the machine itself, not the whole network. If you later want LAN access, make that a deliberate change. Put it behind the same thinking you would use for any other service with prompts, documents, chat history, and model access.
This is where a Mac Mini plus GPU box setup needs a decision. If the Mac Mini is your control station and the GPU box sits elsewhere, you might expose Open WebUI to the LAN, use a tunnel, or keep it behind a private network tool. Each option has tradeoffs. Do not pretend a container port is a security plan.
For more on the home-lab side, read the Mac Mini local AI guide and the secure Open WebUI and Ollama LAN article if you are opening access beyond one machine.
Keep model storage boring
Containers are disposable. Model libraries are not.
Do not leave your Ollama model store trapped in an anonymous volume you cannot find. Mount it somewhere obvious, document it, and make sure your backup policy matches the size and importance of the data.
A simple layout:
/srv/local-ai-data/
  ollama/
  open-webui/
  comfyui-models/
  logs/
This does not mean every model blob needs offsite backup. It means you should know which directory holds the expensive-to-recreate state. Public models can often be re-downloaded. Fine-tunes, Modelfiles, prompts, app settings, workflow notes, and selected outputs deserve more protection.
Storage planning gets real once models multiply. The recommended gear page is the better place to think through drives, NAS, external SSDs, and network paths before turning the boot drive into a landfill.
Pin production, float experiments
The Open WebUI docs show both :main and specific release examples. That distinction matters.
For the stack you use every day, pin versions. For the stack you are testing, float if you want. Do not let an automatic update rewrite the machine you rely on without a rollback plan.
A clean pattern:
/srv/local-ai-stack/production/compose.yaml
/srv/local-ai-stack/staging/compose.yaml
Production uses known tags and real data volumes. Staging uses separate ports and separate volumes. If you want to try a new Open WebUI image, test it against staging first. The Open WebUI docs warn not to share data volumes between dev and production because migrations can be backward-incompatible. That warning is not theoretical lab theater. It is the exact reason staging should have its own data.
For Ollama, the same principle applies to model experiments. Pulling a new model tag is easy. Keeping track of which model answered a client-facing or benchmark prompt is harder. Write it down.
Do not hide ComfyUI too early
ComfyUI is often the most valuable and most fragile part of a local image setup.
It has Python dependencies, custom nodes, model folders, workflow JSON, output paths, and flags that change how memory and network binding behave. The ComfyUI CLI source includes options for listen address, port, output directory, input directory, user directory, extra model paths, low-VRAM modes, CPU offload choices, and more. Those controls are useful, but they also mean a container wrapper needs to be intentional.
For a first serious lab, I like this split:
- Ollama and Open WebUI in Compose.
- ComfyUI installed manually on the host or in a carefully maintained separate project.
- Shared model folders mounted only after paths are documented.
- ComfyUI startup command saved in a service file or README.
Once your ComfyUI workflow is stable, you can containerize it if you have a reason: cleaner deployment, easier rollback, multiple environments, remote rebuilds, or shared lab documentation. But do not turn a working creative tool into an opaque container just to feel tidy.
The better first improvement is usually path discipline:
ComfyUI install:
/opt/ComfyUI/

Models:
/srv/local-ai-data/comfyui-models/

Workflows:
/srv/local-ai-data/comfyui-workflows/

Outputs:
/srv/local-ai-data/comfyui-outputs/
Then point ComfyUI at those folders deliberately. That makes later containerization much easier if you choose it.
Write the restore note while the stack works
Every Compose stack should have a short restore note beside it.
Not a 40-page system manual. A plain file that answers:
- What machine is this?
- What OS and GPU driver were known good?
- Where is the Compose file?
- Where are the data volumes?
- Which ports are exposed?
- Which services should start after reboot?
- How do you update?
- How do you roll back?
- Which folders are backed up?
Example:
Local AI stack restore notes

Host:
RTX workstation in office rack

Services:
Ollama on localhost:11434
Open WebUI on localhost:3000
ComfyUI host install on localhost:8188

Persistent data:
/srv/local-ai-data/ollama
/srv/local-ai-data/open-webui
/srv/local-ai-data/comfyui-models

Start:
cd /srv/local-ai-stack/production
docker compose up -d

Check:
docker compose ps
docker compose logs --tail=100 open-webui
nvidia-smi
This is not busywork. It is how you avoid rebuilding the lab by memory.
Updating without drama
A sane update routine is slow on purpose:
- Read the release notes for the service that matters.
- Back up the Compose file and app data first.
- Pull the new image in staging.
- Start staging on a different port.
- Log in, connect to Ollama, and test a real prompt.
- Update production only if staging behaves.
- Keep the old image tag in your notes until you know the new one is fine.
Do not let Watchtower or any other automatic updater mutate the stack before you have a backup and rollback plan. Automation is useful after the lab is boring. It is risky while you are still figuring out which service owns which data.
If you want to automate something early, automate a status report:
docker compose ps
disk usage for /srv/local-ai-data
nvidia-smi summary
last backup result
That tells you whether the lab is healthy without changing it.
When Docker is the wrong answer
Docker is not mandatory for local AI.
Skip it if you are on a single-user Mac Mini running local apps comfortably. Skip it if your ComfyUI setup is changing daily and you do not yet understand the dependencies. Skip it if GPU container support is turning a working host install into a weekend of driver archaeology.
Use it when the benefits are obvious:
- You want Open WebUI to survive reboots cleanly.
- You want app data in obvious folders.
- You want a reproducible service layout.
- You want to move the stack to a new box later.
- You want staging and production separated.
- You want fewer mystery commands in shell history.
The best local AI stack is not the most containerized stack. It is the one you can restart, update, back up, and explain.
The TokenByte recommendation
For a home-lab RTX box, start with Docker Compose for Ollama and Open WebUI. Keep persistent data in explicit host folders. Bind ports to localhost until you deliberately choose LAN access. Pin versions for anything you rely on. Keep ComfyUI visible until your workflow and model paths are stable.
Then write the restore note before you forget how the stack works.
That is the real win. Not Docker for its own sake, not a perfect YAML file, and not a dashboard full of services you barely use. A good local AI stack should make the box feel less fragile every time you reboot it.