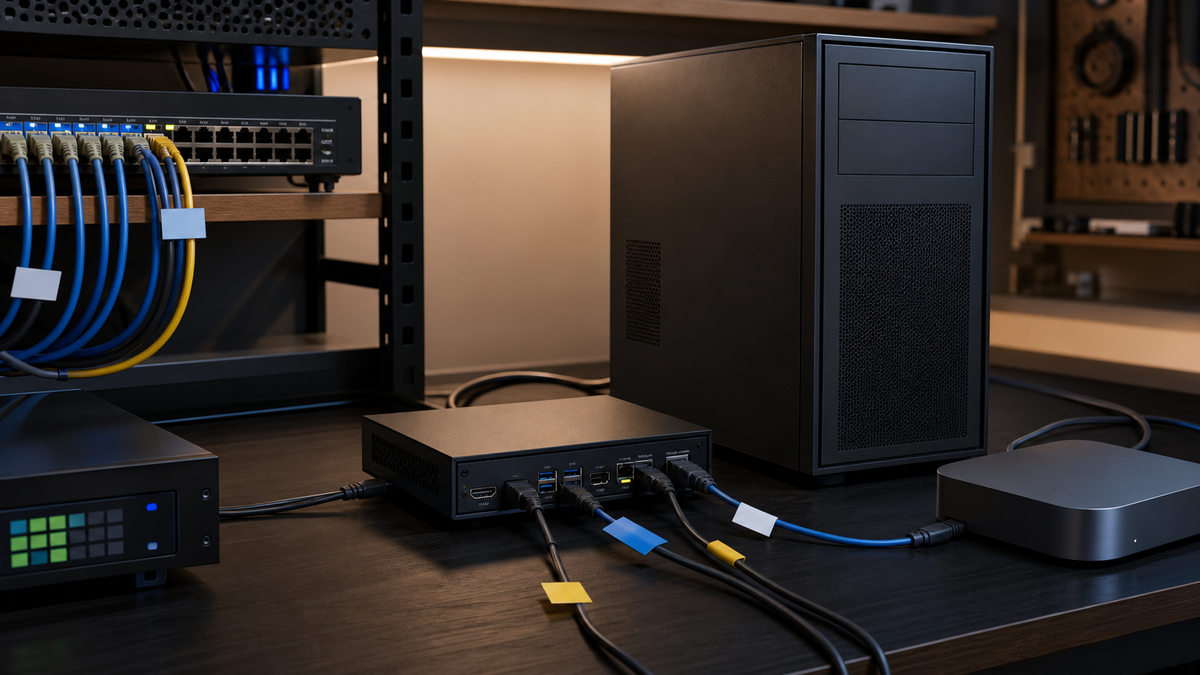
The worst time to think about remote access is when the GPU box is already wedged under a desk, halfway through a driver update, showing nothing over SSH, and waiting for someone to drag over a monitor.
That is how a lot of local AI labs quietly become annoying. The machine works well enough most days, so it gets treated like an appliance. Then a CUDA update hangs. A BIOS setting changes. The boot disk fills. The display output picks the wrong mode. The network service starts after the thing you need to fix. The box is not dead, but it is unreachable in every way that matters.
A headless local AI workstation needs two kinds of access. The first is normal access: SSH, web dashboards, model servers, file shares, and remote desktops. The second is recovery access: keyboard, video, mouse, boot screen, virtual media, and power control when the operating system is not helping.
This guide is about the second layer. It is not a benchmark, and TokenByte has not measured latency or reliability across these devices on the bench yet. This is researched buying and setup context for people building around RTX workstations, compact Mac Mini control machines, and mixed home-lab networks.
Affiliate disclosure: TokenByte may earn a commission if you buy through future retailer links. Recommendations here are based on practical fit, published specifications, and clearly stated tradeoffs, not paid placement.
Start with the failure you actually need to recover from
Most remote access advice starts with software. That is fine for daily work, but it misses the failure modes that make a headless AI box painful.
SSH helps when Linux boots, networking works, the account is healthy, and the service is reachable. A web dashboard helps when the app stack is running. Remote desktop helps when the GPU driver and display session cooperate. None of those tools can reliably change BIOS settings, pick a boot device, fix a system stuck before networking, or press a virtual power button when the OS is frozen.
For a local AI lab, the recovery plan should cover five questions:
- Can I see the machine before the operating system boots?
- Can I send keyboard and mouse input at BIOS, bootloader, and installer screens?
- Can I power-cycle or reset the box without crawling behind it?
- Can I reach the console from my normal laptop without exposing it to the public internet?
- Can I still use the machine locally when I am sitting at the desk?
If the answer to any of those is no, the machine is not really headless. It is just temporarily monitorless.
Keep software access, but do not confuse it with out-of-band access
You should still have a clean software path. A sensible RTX workstation should have SSH enabled, a stable hostname, a reserved DHCP lease or static address, and a documented admin user. If you use Tailscale, Tailscale SSH can centralize SSH authentication and authorization through tailnet policy instead of relying only on local key distribution. Tailscale also documents check mode for higher-risk connections, which is useful when root or admin access should require a fresh identity check.
That is the normal lane.
The recovery lane is different. KVM-over-IP devices connect to the target machine as if they were a local monitor and USB keyboard/mouse. The target computer does not need a working agent, app, GPU service, or remote desktop session. As long as the device can capture video, emulate input, and reach the network, you get a browser-based view of the machine.
That distinction matters when you are running a box that may spend hours under GPU load, boot into Linux, dual-boot for firmware tools, or get experimental driver stacks. SSH is a door. KVM-over-IP is the spare key taped to the actual hardware plan.
The three practical console options
There are three realistic paths for a home-lab AI builder.
Option 1: Software only
This is the cheapest path and the easiest to start with. Use SSH over LAN or Tailscale, a remote desktop tool only when needed, a smart plug for last-resort power removal, and a written recovery checklist.
It is enough for a Mac Mini that runs stable services, a Linux box you can physically reach, or a workstation that is not painful to connect to a monitor. It is not enough for a machine you intend to keep in a closet, garage rack, basement shelf, or office where the display cable is always missing.
Use this path when the machine is low-risk, easy to reach, and not your only compute node.
Option 2: Single-machine KVM-over-IP
This is the sweet spot for most serious local AI labs. A dedicated KVM-over-IP box connects by HDMI, USB, and Ethernet. You open a browser and see the machine. Depending on the device and setup, you may also get virtual media, Wake-on-LAN, serial console support, ATX power control, or a cloud/VPN remote path.
PiKVM, JetKVM, and TinyPilot all sit in this category, but they aim at slightly different buyers.
PiKVM is the broadest feature toolbox. The official V4 guide describes BIOS/UEFI access, virtual CD-ROM or flash-drive reinstall workflows, ATX control hardware in the box, HDMI and USB wiring, and immediate password-hardening steps after setup. It is a strong fit if you want a deep, open, configurable recovery appliance and you are comfortable reading documentation.
JetKVM is the newer lightweight option with a polished small-device workflow. Its docs describe 1080p at 60 FPS video, optional cloud access through WebRTC, open-source software, local browser access, Tailscale installation support, and extension hardware for ATX power, DC power, and serial console. The product page points buyers to authorized resellers and notes that pricing varies by region, so check the current regional source before treating any price as fixed.
TinyPilot Voyager 3 is the procurement-friendly option. Its product page lists a browser-based KVM-over-IP and console-server design, Gigabit Ethernet, a Plus model with PoE and a second Ethernet port, HTML5 access without client software, 1920x1200 capture at 60 frames per second, HDMI loop output, TLS/HTTPS, and up to eight concurrent remote users. At the time of research on July 31, 2026, the standard Voyager 3 page showed $399 before shipping and options. Treat that as a live page snapshot, not a permanent street price.
Use this path when one AI workstation matters enough that a failed boot should not become a furniture-moving event.
Option 3: KVM plus switch or rack console pattern
If you have several machines, one KVM-over-IP device per box gets expensive and messy. The next level is a KVM-over-IP device feeding a physical KVM switch, or a purpose-built multiport setup.
This is where you need to be more careful. Keyboard, mouse, hotkey switching, EDID behavior, and HDMI capture can get weird when devices are chained. Do not assume a gaming HDMI switch will behave well at BIOS screens. If you go this route, buy from a retailer with a practical return window, test every port with cold boots, and document the hotkey path while everything still works.
For most home labs, one KVM on the most important RTX workstation is the better first move. Add switching only after the single-machine recovery path is boring.
What to buy around, not just what to buy
The device is only one part of the console plan. The details around it decide whether it works on the bad day.
Video capture and resolution
Remote console work does not need 4K. It needs predictable BIOS and installer visibility. TinyPilot documents Voyager 3 HDMI support up to 1920x1200 at 60 Hz and lists unsupported high-end modes such as QHD and 4K. PiKVM V4 documentation points to 1920x1080 and 1920x1200 modes for better UEFI/BIOS compatibility. JetKVM documents 1080p at 60 FPS.
For an AI workstation, set the machine to a boring console resolution for recovery. Keep the high-resolution monitor path separate. You do not need the KVM to be your perfect daily display. You need it to show boot screens every time.
HDMI passthrough and local desk use
If the workstation also sits at your desk, HDMI passthrough matters. A passthrough output lets the KVM device sit between the computer and local monitor. Without it, you may need a splitter, a second display output, or a manual cable swap.
Do not bury the box until you test local display behavior, remote display behavior, and reboot behavior. The console should still work after a cold boot with the local monitor off.
USB keyboard and mouse emulation
The KVM path needs to behave like a plain USB keyboard and mouse before the OS loads. Avoid USB hubs between the KVM and target unless the device documentation explicitly supports your arrangement. PiKVM's V4 guide warns that some UEFI/BIOS setups may fail to detect devices through a USB hub at boot.
If your motherboard has a known-good rear USB 2.0 port, use it for the KVM. Save the fancy high-speed ports for drives and capture hardware.
Power control
Power control is the difference between "I can see the frozen screen" and "I can recover the machine."
Wake-on-LAN is useful if the machine supports it and the NIC stays powered. It is not a universal reset button. ATX control is stronger because it can simulate the case power and reset buttons through the motherboard front-panel header. PiKVM V4 includes ATX control hardware in the box. JetKVM supports an ATX extension board that sits in an empty slot opening and wires into the front-panel header. TinyPilot emphasizes KVM and console-server access, but its public comparison page says PiKVM has ATX power control where Voyager 3 does not, so factor that into the buy.
For a GPU workstation, I would rather have clean ATX control than another decorative dashboard.
Network path
Put the KVM on wired Ethernet. Wi-Fi might work for setup convenience, but recovery gear should not depend on RF conditions, a sleepy access point, or a password change you forgot to update. TinyPilot's product page lists Wi-Fi support but notes that it is not recommended as the primary connection method. PiKVM and JetKVM setup flows also start with Ethernet.
Give the KVM a reserved IP address and a memorable DNS name. Put that name in your lab notes, password manager, or recovery sheet. If you cannot find the console during a failure, you do not have a console.
Security: never publish the console to the open internet
A KVM is powerful because it can act below the operating system. That also makes it sensitive. If someone reaches it, they may be able to reboot, mount media, change BIOS settings, or interact with disk encryption prompts.
Do not forward the KVM web interface from your router to the public internet.
Use a VPN or private overlay. Tailscale is a practical option because it supports identity-based access controls, and Tailscale SSH can sit beside the KVM plan for normal shell access. JetKVM documents optional cloud remote access and Tailscale support. PiKVM documentation points to internet access options including Tailscale VPN. TinyPilot positions the device for LAN, VPN, and Zero Trust overlays rather than mandatory public exposure.
The policy should be simple:
- KVM local web UI is reachable only from trusted management devices.
- Remote KVM access goes through VPN, tailnet, or a similarly private path.
- Default passwords are changed during first setup.
- Admin access is stored in a password manager.
- Recovery access is tested after every network or identity-policy change.
That is more boring than a flashy remote dashboard, which is exactly the point.
A practical wiring plan for one RTX AI workstation
Here is the clean version I would build for a single important GPU box.
Put the workstation, KVM device, switch, and power strip on the same side of the desk or rack. Connect the KVM to wired Ethernet and reserve its IP. Run HDMI from the workstation's simplest display output to the KVM input. If you need a local monitor, use passthrough if the device supports it, or a known-good splitter only after testing cold boots.
Connect USB from the KVM directly to a rear motherboard USB port. If using ATX control, wire the board carefully to the front-panel header with the motherboard manual open. Keep the physical case buttons working if the device supports pass-through wiring. Label the HDMI, USB, Ethernet, and ATX cables with blank color tags or plain names. Do not rely on memory.
Then document four URLs or names:
- The KVM local URL
- The KVM tailnet or VPN URL
- The workstation SSH name
- The switch or router page where the reserved IP lives
Finally, create a tiny recovery drill:
- Reboot into BIOS from the KVM.
- Confirm keyboard input works before the OS loads.
- Confirm you can see the boot device menu.
- Confirm Wake-on-LAN or ATX power control does what you expect.
- Confirm you can reach the KVM from your normal laptop over the private remote path.
If that drill fails, fix it while the machine is healthy.
Buying guidance
Buy the level of recovery that matches the machine's importance.
If the workstation is experimental and physically easy to reach, start with SSH, Tailscale, a reserved IP, and a monitor cable kept nearby. Spend the money elsewhere.
If the workstation is a daily AI box with an RTX 3090, 4090, 5090, or similar card, buy a real KVM-over-IP device before the next driver, BIOS, or storage change. The first time it saves a failed boot, it will feel less like a gadget and more like infrastructure.
If you want the deepest open hardware and software toolbox, start your research with PiKVM. If you want a compact newer device with optional cloud/WebRTC access and extension boards, look at JetKVM. If you want a more polished commercial appliance with PoE and procurement-friendly positioning, look at TinyPilot Voyager 3.
For the rest of the build, keep TokenByte's broader planning pages nearby: use the Build Picker to decide whether the machine should be Apple Silicon, CUDA, or shared infrastructure; check Recommended Gear before buying supporting hardware; use the Mac Mini guide if the compact machine is your control node; compare older GPU workflow constraints in the ComfyUI GPU guide if image generation is part of the lab; and treat the How We Test page as the standard for turning this researched plan into a measured TokenByte bench result later.
The rule
If a machine matters, you should be able to fix it when the OS is not cooperating.
That does not mean every local AI box needs a rack full of enterprise management hardware. It means the headless workstation needs a recovery path that has already been wired, named, secured, and tested.
Do that before the next upgrade. A monitor cable is cheap. A monitor cable you need at midnight, behind a hot GPU box, during a failed boot, is not.