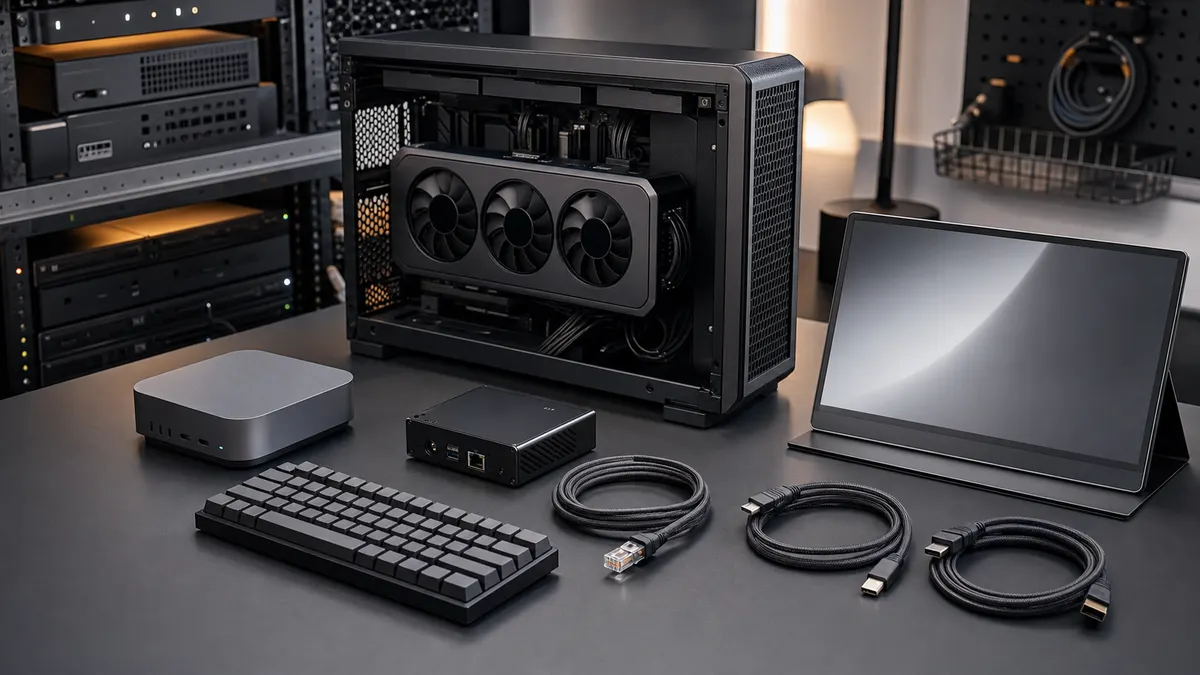
The worst time to design your local AI recovery plan is when the RTX box is already wedged in the corner with no display, no keyboard, no web UI, and a driver update that did not come back cleanly.
Headless setups are great when they work. A GPU tower in another room can run Ollama, ComfyUI, Open WebUI, batch jobs, and model downloads without adding fan noise to the desk. A Mac Mini or laptop can stay pleasant. A NAS can hold the heavy files. Everything feels like infrastructure.
Then one small thing breaks. The machine boots to a BIOS prompt. The network interface changes names. The NVIDIA driver fails to load. ComfyUI starts on localhost only. Docker restarts the wrong service forever. The box is technically alive, but you cannot reach the part you need.
That is when a headless recovery kit pays for itself.
This is researched home-lab operating guidance for June 29, 2026, not a TokenByte hands-on review of a specific KVM, smart plug, GPU, or remote-access appliance. TokenByte has not measured latency, reliability, capture quality, or failure rates for the products mentioned here. Treat this as a practical planning checklist, then test your own hardware before you rely on it.
Affiliate disclosure: TokenByte may earn a commission when you buy through links on this site. That does not change the recommendation here: buy the smallest recovery setup that lets you fix the box calmly, not the most elaborate remote-management gadget on the page.
The short version
A good headless recovery kit gives you four ways back into the machine:
- network access for normal work
- console access when the OS is confused
- power control when the machine is stuck
- written recovery notes when you are tired
For a TokenByte-style local AI lab, that usually means:
- SSH that you have tested from another machine
- a private network path such as Tailscale, if you need remote access
- a real keyboard-video-mouse fallback for BIOS and early boot
- a safe way to power-cycle the box without crawling under the desk
- startup notes for Ollama, Open WebUI, ComfyUI, Docker, model paths, and GPU checks
- a small bag of cables, adapters, and known-good parts
If you are still choosing the overall machine, start with the TokenByte build picker, the Mac Mini local AI guide, and the ComfyUI GPU guide. If you are already shopping for the support hardware, keep the recommended gear hub open, but resist buying more parts until you know what failure you are trying to recover from.
Why headless boxes fail differently
A normal desktop has an obvious recovery path. You look at the monitor, press a key, click through the update prompt, and see whether the machine is stuck at login, BIOS, disk unlock, or a desktop error.
A headless AI box hides that context.
When the web UI is down, you do not immediately know whether the whole machine is down. When SSH fails, you do not know whether the network is broken, the service is off, the firewall changed, or the machine never booted. When ComfyUI is unreachable, you do not know whether Python crashed, the listen address is wrong, the GPU is out of memory, or the browser shortcut points at the wrong host.
That ambiguity is what wastes weekends.
The recovery kit is not about making the lab fancy. It is about shortening the path from "nothing responds" to one of a few clear states:
| Symptom | What you need next |
|---|---|
| Machine has no network | local console or KVM |
| Machine has network but no services | SSH and service logs |
| GPU is missing or wedged | nvidia-smi, driver notes, reboot path |
| Web UI is unreachable | port, bind address, firewall, reverse proxy checks |
| BIOS or disk prompt is waiting | keyboard and video before the OS loads |
| Power state is unknown | switched PDU, smart plug, or physical access |
The point is not to eliminate every failure. The point is to make each failure legible.
Start with the boring path: SSH
SSH should be the first recovery layer because it is simple, common, and fast.
Ubuntu's OpenSSH server documentation covers installing and enabling the server, and that is still the baseline for a Linux AI box. Do not treat SSH as "probably working." Test it from the machine you actually use every day. Test it after a reboot. Test it before the box moves to a shelf, closet, rack, or utility room.
Your basic recovery note should include:
- hostname and local IP address
- SSH username
- where SSH keys live on the client machine
- whether password login is disabled
- which port is expected
- how to restart the service locally
- how to reach the box over the private network, if used
For remote access, Tailscale SSH is worth understanding because it can let you authenticate SSH through a Tailscale network and access-control policy instead of exposing an SSH port to the public internet. That does not make every setup automatically safe. It gives you a better default shape than port-forwarding a raw SSH service from a home router.
The rule is simple: private access first, public exposure only with a reason.
If the box runs personal prompts, private documents, model experiments, image outputs, or automation tokens, treat remote access as part of the security design, not a convenience toggle. TokenByte covered the same idea in the secure Open WebUI and Ollama LAN guide: local AI tools often start as friendly lab services, not hardened public apps.
SSH is not enough
SSH only helps after the operating system is up, the network works, and the SSH service starts.
That is a lot of assumptions.
SSH will not help when:
- the machine is waiting at BIOS
- Secure Boot or boot order changed
- disk unlock is required before the network starts
- the network driver or interface config broke
- the wrong drive is first in the boot order
- the machine is stuck before systemd
- the GPU is needed for display but the driver stack is broken
This is why a real console fallback matters.
For an occasional home-lab box, the cheapest fallback may be a known-good portable monitor, a compact keyboard, a long HDMI or DisplayPort cable, and a USB extension cable stored near the machine. That is not glamorous, but it works when the box is only across the room.
For a machine that lives in a closet, rack, basement, or another building, an IP KVM starts to make more sense.
PiKVM's official documentation describes a remote keyboard-video-mouse system built around Raspberry Pi hardware, with access to video capture and USB keyboard or mouse control. TinyPilot sells the Voyager 2a as a finished remote KVM appliance. Those are not the only options, and this article is not a product review. The important point is the function: you need a way to see and type before the OS is healthy.
That is the dividing line between "remote admin" and "actual recovery."
What an IP KVM changes
An IP KVM is useful because it sits outside the operating system. It can show the boot screen, BIOS setup, disk prompts, kernel messages, and early errors that a web dashboard will never see.
For a headless local AI box, that is valuable in very specific moments:
- after BIOS updates
- after GPU swaps
- after boot drive changes
- after Linux or Windows bootloader changes
- after driver changes that affect display output
- when the box appears dead but fans and lights are on
- when you need to select a temporary boot device
It is less useful for normal daily work. Do not buy one because you want another dashboard. Buy one if the cost and wiring are justified by the cost of physically recovering the box.
The cheap middle ground is also valid:
- keep a small monitor nearby
- keep one known-good keyboard nearby
- keep a known-good HDMI or DisplayPort cable nearby
- keep the correct display adapter in the same bag
- keep a USB hub if the machine has awkward ports
- label the GPU output you expect to use
For many readers, that kit is enough. It is not remote, but it is immediate.
For the more serious setup, the IP KVM should be wired before the failure. Test it at BIOS, not only after the OS boots. If it cannot show BIOS or send keystrokes before Linux starts, it is not solving the hard recovery problem.
Add power control, carefully
Sometimes the machine is stuck badly enough that you need a power cycle.
That does not mean every AI box should sit behind a random smart plug. A high-power workstation with a large PSU, multiple GPUs, spinning disks, or a UPS deserves more care than a lamp. Use hardware rated for the load, respect the UPS and PSU path, and do not treat remote hard power cuts as normal operations.
The sane order is:
- Try a clean reboot over SSH.
- Try service-level recovery.
- Use the KVM to inspect the console.
- Use the OS power controls if possible.
- Use remote power only when the machine is genuinely stuck.
If you use a smart plug, switched PDU, or UPS-controlled outlet, document which outlet owns which machine. Label the plug. Test power restoration in the BIOS. Many motherboards have a setting for what to do after AC power loss, and that setting matters if you expect the box to come back after an outage or remote power cycle.
Do not make the recovery path depend on memory. A tiny label that says "RTX box" is better than guessing from an app screen at midnight.
Keep Docker from hiding failures
Docker restart policies are useful, but they can also hide a broken service behind constant restarts.
Docker's documentation explains restart policies such as no, on-failure, always, and unless-stopped. Those policies are reasonable once the service is known-good. They are not a substitute for logs, backups, and deliberate startup order.
For a headless AI box, I like this habit:
- use restart policies for stable support services
- avoid automatic restart loops while testing new containers
- keep
docker compose psin the recovery note - keep
docker compose logs --tail=100 <service>in the recovery note - document which services should be up after a reboot
The difference matters.
If Open WebUI restarts forever because a database migration failed, the machine may look "alive" from Docker's perspective while the user-facing service is unusable. If a ComfyUI container keeps restarting because a custom node import fails, the GPU may be fine. If Ollama is running but bound only to localhost, the service may be healthy and still unreachable from your Mac Mini.
Do not debug headless systems by vibes. Ask small questions:
- Is the host up?
- Can I SSH in?
- Is Docker running?
- Are the expected containers up?
- What do the last 100 log lines say?
- Is the service listening on the expected address and port?
- Is the reverse proxy pointing at the right target?
That checklist is boring because it works.
Save the ComfyUI escape hatches
ComfyUI is one of the best reasons to own a serious local GPU, and also one of the easiest ways to create a headless recovery problem.
Custom nodes, Python environments, model paths, output folders, low-VRAM flags, network binding, and user directories can all affect whether a workflow starts cleanly. The ComfyUI command-line arguments source includes flags for the listen address, port, input directory, output directory, user directory, extra model paths, and custom-node controls such as disabling all custom nodes.
That means your recovery note should include your exact known-good startup command.
Example:
ComfyUI recovery notes

Install path:
/opt/ComfyUI

Known-good startup:
python main.py --listen 0.0.0.0 --port 8188 --output-directory /srv/ai/outputs

Safe startup for custom-node debugging:
python main.py --disable-all-custom-nodes

Model paths:
/srv/ai/models
/mnt/nas/comfyui-models
Do not wait until a custom node breaks to figure out the safe startup path. Write it down while the system works.
If ComfyUI is only used from one trusted machine, binding it to localhost and reaching it through a tunnel or reverse proxy may be better than binding to the whole LAN. If it is intentionally available on the LAN, document that decision. Either way, the recovery note should say what is expected.
The headless ComfyUI GPU box guide is still the broader workflow reference. This article is the recovery layer that keeps that setup serviceable.
Save the NVIDIA baseline
The NVIDIA layer is another place where notes beat guessing.
NVIDIA's nvidia-smi documentation is the official reference for the command-line tool most people use first. It can report GPU identity, utilization, memory use, temperature, power-related fields, driver details, and process information. The same documentation also warns that exact command output can change and that GPU reset behavior depends on hardware and system conditions. In other words, use it as a first look, but do not build fragile parsing or heroic recovery plans around assumptions it does not promise.
Your baseline note should include:
- GPU model
- GPU UUID from
nvidia-smi -L - driver version when the system was known-good
- CUDA version reported by the driver stack
- which services use the GPU
- normal idle power and memory state, if you track it
- normal fan or temperature behavior, if relevant
For a one-GPU box, this may feel excessive. It becomes useful the first time a driver update changes behavior, a service starts on CPU, or a second card enters the machine.
Tie this back to TokenByte's How We Test principle: write down what you know, separate measured local evidence from general advice, and keep enough context that a future result can be compared honestly.
Build the physical bag
The recovery kit should have a physical part.
Not a junk drawer. A small, boring bag or box that lives near the AI machine.
Put these in it:
- compact USB keyboard
- known-good HDMI cable
- known-good DisplayPort cable, if your GPU needs it
- HDMI or DisplayPort adapter for your portable monitor
- USB-A to USB-C adapter
- short Ethernet cable
- longer Ethernet cable
- spare USB flash drive for installer or rescue media
- small labels
- a tiny notebook or printed recovery sheet
- any special screws, brackets, or cage keys your setup requires
If the AI box is in a rack or shelf, add:
- spare rack screws
- a flashlight
- a short power cable
- a labeled cable tie or Velcro wrap
- a note showing which switch port the box uses
If you use an IP KVM, add:
- the KVM URL
- its login method
- its power source
- which HDMI output it watches
- which USB port it controls
- how to reach it over the private network
The goal is to avoid the most irritating version of failure: the one where you know what to do but cannot find the adapter.
Do the test while nothing is broken
A recovery kit is not real until you run the drill.
Do this on a quiet day:
- Reboot the AI box from SSH.
- Confirm you can reconnect.
- Stop Open WebUI and start it again.
- Stop ComfyUI and start it again.
- Run
nvidia-smiand save the known-good output. - Confirm Docker services match the note.
- Confirm the KVM or monitor shows BIOS.
- Confirm the keyboard works before the OS boots.
- Confirm the machine returns after a power-loss simulation, if safe for your hardware.
Do not run the power-loss test if you are unsure about the UPS, storage, filesystem, or PSU path. The point is not to create a disaster for practice. The point is to learn which recovery assumptions are false before a real failure forces the issue.
This is also where you notice missing pieces:
- the KVM is plugged into the wrong GPU output
- the keyboard works in Linux but not BIOS
- the portable monitor does not support the resolution
- the machine does not power back on after AC loss
- SSH keys only exist on the laptop you left at work
- the reverse proxy depends on a service running on the same broken box
Those are cheap fixes on a calm day.
What to buy, and what to skip
Buy the recovery kit in layers.
Layer one is almost free:
- SSH configured and tested
- recovery note written
- known-good service commands saved
- internal links and ports documented
- GPU baseline captured
Layer two is low-cost physical access:
- compact keyboard
- known-good cables
- portable display or display adapter
- spare Ethernet cable
- rescue USB drive
Layer three is convenience and distance:
- private network access such as Tailscale
- reliable remote power control
- IP KVM if the box is hard to physically reach
Layer four is for more serious labs:
- switched PDU
- UPS integration
- dedicated management network
- spare boot drive
- documented restore image
Skip expensive recovery gear if the box is sitting beside your desk and downtime is harmless. Spend the money on backups, storage, power protection, or the GPU itself. But if the box is across the house, used by other people, or painful to physically access, a recovery kit stops being a luxury and starts being operational sanity.
The practical default
The best headless local AI box is not the one with the cleverest remote dashboard. It is the one you can recover without guessing.
Start with SSH. Add private remote access only when you need it. Keep a real console path for BIOS and early boot. Write down the Docker, ComfyUI, Ollama, Open WebUI, model-path, and NVIDIA facts while the system is healthy. Keep the physical adapters in one place. Test the recovery path before the machine is important.
That work does not make your RTX 4090 or 5090 faster. It does not make a small model smarter. It does not make ComfyUI custom nodes less fragile.
It makes the lab recoverable.
For home-lab AI, recoverable is not boring. Recoverable is what lets you keep experimenting without turning every driver update, GPU swap, or failed boot into a full afternoon of cable archaeology.
Found something that needs correcting? Tell the editor. Research, estimates, and hands-on measurements should be identified in the article. Read our affiliate disclosure.