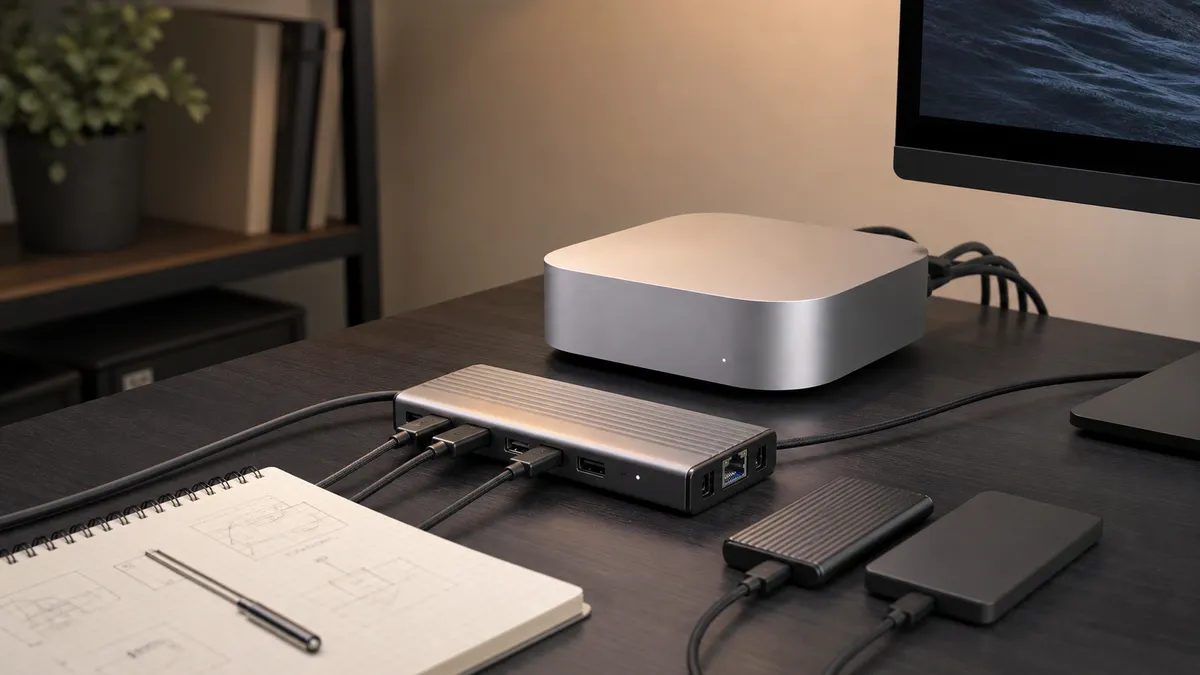
A Mac Mini local AI desk usually starts clean.
The little box is quiet. One monitor. One external SSD. Maybe a keyboard, a network cable, and a local model app that finally makes the setup feel useful. Then the lab grows by a cable at a time: another NVMe drive for models, a second drive for outputs, a USB audio interface, a faster Ethernet adapter, an SD card reader, a capture dongle, a UPS cable, a webcam, and the monitor you forgot was already using one of the good ports.
That is how a quiet AI desk turns into a troubleshooting pile.
The fix is not automatically "buy the biggest Thunderbolt 5 dock." The fix is to decide which devices need real bandwidth, which devices only need convenience, and which ports should stay directly attached to the Mac Mini. A good dock plan keeps the desk boring in the best way: model drives mount reliably, the network stays fast, displays wake up, and the expensive little computer does not spend its life wearing cheap adapters.
Affiliate disclosure: TokenByte may earn a commission when affiliate links are added to this guide later. That does not change the recommendation here: buy the dock only after the port map proves it solves a real bottleneck.
The Fast Verdict
If your Mac Mini local AI setup uses one monitor, one external model drive, and normal peripherals, you may not need a premium dock yet.
If the desk has two or more high-speed drives, wired networking, display adapters, card readers, audio gear, and always-on automation hardware, plan the dock before buying the next accessory.
Write down five things:
- Which Mac Mini you have: M4 or M4 Pro.
- Which port each display uses.
- Which drive holds active models, caches, outputs, and backups.
- Whether Ethernet is built in, upgraded at purchase, or handled by an adapter.
- Which devices need high-speed data versus simple USB convenience.
That small map matters because Apple lists different port ceilings for the current Mac Mini family. The M4 Mac Mini has three rear Thunderbolt 4 ports up to 40Gb/s, plus two front USB-C ports that support USB 3 up to 10Gb/s. The M4 Pro Mac Mini has three rear Thunderbolt 5 ports up to 120Gb/s, with the same two front USB-C 10Gb/s ports. Both can be configured with 10Gb Ethernet at purchase.
Those are good ports. They are not infinite ports.
If you are still choosing the machine, start with the TokenByte Mac Mini local AI guide and the build picker before spending dock money.
If the Mac Mini is only the quiet side of a larger image-generation setup, keep the dock decision separate from the GPU decision. The ComfyUI GPU guide is where VRAM and image-workflow limits belong; this guide is about the desk I/O that keeps the Mac useful.
Do Not Treat USB-C as a Speed Rating
USB-C is the connector shape. It is not the promise.
That is the source of half the mess. A cable, dock, drive, and host can all use USB-C connectors while negotiating very different speeds and features. One port might be Thunderbolt 5. Another might be Thunderbolt 4. Another might be USB4. Another might be a 10Gb/s USB port that is perfectly fine for a keyboard or card reader and disappointing for a fast NVMe drive.
Intel describes Thunderbolt 5 as offering up to 80Gb/s bidirectional bandwidth, with Bandwidth Boost up to 120Gb/s for display-heavy use. USB-IF describes USB4 as dynamically sharing the high-speed link across data and display protocols, with up to 80Gb/s operation over certified 80Gb/s cables in the current USB4 materials.
That does not mean every device on the desk gets that number. The actual path is negotiated by the Mac, dock, cable, enclosure, SSD, display, and any adapters in the middle.
The practical rule: use the fastest rear ports for the devices that can actually use them. Use the front 10Gb/s ports for convenience devices, temporary transfers, controllers, audio, and lower-speed accessories. Do not waste a premium Thunderbolt path on a receiver dongle if a fast model drive is sitting on a cheap hub.
Put Displays on the Map First
Displays quietly consume dock planning.
The M4 Mac Mini can support up to three displays in Apple's published combinations, including two over Thunderbolt and one over HDMI in one three-display layout. The M4 Pro also supports up to three displays, with stronger Thunderbolt 5 display output and DisplayPort 2.1 over USB-C. The point for a local AI desk is simple: decide the displays first, then plan storage and networking around what remains.
If you only use one monitor through HDMI, the dock decision is easier. If you use two or three displays, high-refresh monitors, a capture workflow, or a monitor with USB-C hub features, the dock has to be chosen with display behavior in mind.
This is where cheap docks can become expensive. A low-cost USB-C dock may be fine for office work and still be the wrong tool for a Mac Mini desk that needs reliable display wake, high-speed storage, and wired network at the same time.
Do not buy from the front photo. Read the compatibility notes, display limits, OS requirements, included cable, and return policy.
Separate Fast Storage from Desk Convenience
Local AI storage has two different jobs.
One job is active work: model files, local caches, output folders, small datasets, and the files your automation touches every day. That path benefits from a clean high-speed connection.
The other job is desk convenience: thumb drives, SD cards, a phone cable, a keyboard, a controller, a webcam, and the random thing you plug in for five minutes. Those devices need reachable ports more than they need a premium lane.
For a Mac Mini lab, I would rather see one serious external NVMe drive connected directly or through a high-quality Thunderbolt/USB4 dock than three unlabeled drives hanging from a bargain hub. Model folders and output paths should be predictable. If you already have a storage mess, read TokenByte's scratch-drive plan before buying another enclosure.
A dock with an integrated SSD slot can be tempting here. Sonnet's Echo 13 Thunderbolt 5 SSD Dock, for example, combines Thunderbolt 5 docking with an internal M.2 NVMe slot and 2.5Gb Ethernet. Sonnet lists up to 6600 MB/s performance with a Thunderbolt 5 computer for the add-your-own-SSD path, while also noting that performance varies by CPU, operating system, SSD format, and transfer size.
That is useful context, not a TokenByte benchmark. The buying question is not "what is the biggest number on the page?" The buying question is whether combining dock and storage makes the desk simpler, cooler, and easier to restore, or whether it creates one expensive box that now owns too many jobs.
For model archives, shared datasets, and backups, a NAS may still be the better home. TokenByte's NAS model library guide is the better path when more than one machine needs the same files.
Ethernet Is Not an Afterthought
If the Mac Mini is going to be an always-on AI utility box, wired networking deserves a real decision.
Apple lets current Mac Mini buyers configure 10Gb Ethernet. If you know the machine will sit near a NAS, a GPU workstation, or a multi-gig switch, that upgrade can be cleaner than adding a network adapter later. If you already bought the machine with Gigabit Ethernet, a Thunderbolt or USB adapter can still make sense, but now it has to be part of the dock plan.
A 2.5GbE adapter is often enough for a small Mac Mini lab. A 10GbE path makes more sense when large model transfers, NAS-backed datasets, or direct workstation-to-NAS work are genuinely common. Either way, do not hang your serious network path off the cheapest hub on the desk and then blame the NAS.
This also connects to yesterday's PCIe planning from the other side. A GPU tower may need a PCIe NIC. A Mac Mini may need a dock or adapter. The goal is the same: give the network path a stable place to live before the lab depends on it. Read the PCIe lane guide if the Mac is only one machine in a larger setup.
Thunderbolt 5 Is Not Always the Smart Buy
Thunderbolt 5 gear is real now, and it can be impressive.
As checked on July 22, 2026, OWC's Thunderbolt 5 Hub page listed a $189.99 configuration and in-stock status, with four Thunderbolt-style ports, host power delivery notes, and support that scales down on older hosts. Plugable's TBT-UDT3 page listed a $299.95 Thunderbolt 5 dock with 140W laptop charging, 2.5Gbps Ethernet, multiple USB ports, and display support that depends on the host system. Sonnet's store listed several Thunderbolt 5 docks, including the Echo 13 add-your-own-SSD model at $299.99.
Those are examples, not blanket recommendations. Prices, availability, firmware, and compatibility notes change. TokenByte has not bench-tested those docks yet.
The more important rule is this:
- Buy Thunderbolt 5 when the Mac and the devices can use it.
- Buy Thunderbolt 4 or USB4 when the workload is already satisfied at 40Gb/s.
- Buy a simple USB hub when the devices are low-speed and convenience is the only problem.
- Buy nothing when the real issue is messy storage paths, not port count.
An M4 Pro Mac Mini with Thunderbolt 5 can justify a Thunderbolt 5 dock faster than a base M4 Mac Mini can. A base M4 Mac Mini can still be an excellent local AI utility box, but a Thunderbolt 5 dock does not turn its Thunderbolt 4 ports into Thunderbolt 5 ports.
That is the kind of boring compatibility sentence that saves money.
Cables Are Part of the Product
A dock plan without a cable plan is unfinished.
For local AI desks, the cable has to carry the connection you are paying for. If the dock includes a certified cable, start there. If you replace it, buy for the actual standard and length you need. Shorter, known-good cables are usually easier to trust than a mystery long cable from a drawer.
Label the high-speed cables. Label the model drive. Label the backup drive. Keep one spare known-good cable in the desk. When a drive starts disconnecting, you want a fast way to test the cable before blaming the SSD, dock, Mac, or filesystem.
This sounds fussy until a model download, transcript cleanup job, or overnight batch fails because a cable was slightly loose and nobody knows which one.
A Simple Mac Mini Dock Map
Here is a practical layout for a modest local AI desk:
- HDMI: main monitor.
- Rear Thunderbolt/USB4 port 1: primary external model or scratch drive.
- Rear Thunderbolt/USB4 port 2: dock or hub.
- Rear Thunderbolt/USB4 port 3: fast network adapter, second high-speed drive, or second display.
- Front USB-C ports: temporary devices, audio, controllers, card reader, phone, or quick imports.
- Built-in Ethernet: use it if Gigabit is enough; prefer the 10Gb built-in option if buying new for a NAS-heavy setup.
On a more demanding M4 Pro desk, the dock may become the center of the setup. That is fine if it is deliberate. The mistake is letting the dock become a junk drawer for every device, including the ones that should have stayed directly connected.
The Buying Checklist
Before buying a dock, answer these questions:
- Which exact Mac Mini model and ports do I have?
- How many displays need to work every day?
- Which drive must be fast and reliable?
- Do I need 2.5GbE or 10GbE, or is built-in Gigabit enough?
- Does the dock include the cable needed for full performance?
- Does the dock need external power?
- Does the dock support my macOS version?
- What happens if the dock fails: does the whole lab stop?
- Can I return it if display wake, drive stability, or Ethernet behavior is bad in my setup?
For affiliate buying pages, TokenByte should eventually separate docks into plain categories:
| Dock type | Best fit | Skip when |
|---|---|---|
| Simple USB-C hub | Keyboard, card reader, audio, occasional accessories | You expect fast model-drive performance |
| Thunderbolt 4 / USB4 dock | Base M4 Mac Mini desks, 40Gb/s storage, monitor/peripheral cleanup | You bought an M4 Pro specifically for faster external storage |
| Thunderbolt 5 hub | M4 Pro desks with multiple high-speed devices | The host or drives cannot use the extra bandwidth |
| Dock with Ethernet | NAS workflows, cleaner cabling, no built-in 10GbE | The Ethernet path is slower or less stable than a direct adapter |
| Dock with internal SSD | Clean one-box desk storage | You want storage that is easy to move, replace, or keep separate from dock failures |
That category-first approach matches TokenByte's recommended gear rule: every future dock pick needs a workload fit, a compatibility risk, and a reason not to buy yet.
What TokenByte Would Test Before Calling a Winner
Dock reviews need receipts.
Before TokenByte should call any Mac Mini dock the best pick, the test needs to cover:
- exact Mac Mini model and macOS version
- dock firmware and included cable
- drive model, enclosure, filesystem, and transfer size
- Ethernet link speed and sustained copy behavior
- display wake after sleep
- thermal behavior during long transfers
- whether devices reconnect cleanly after reboot
- whether a local AI workflow actually benefits from the faster path
That is why this guide is a plan, not a ranked dock review. The official specs tell us what is possible. A TokenByte test should prove what is stable on the desk.
The How We Test page is the standard here: researched context is useful, but buying verdicts need evidence.
The Bottom Line
A dock is not decoration. It is infrastructure for the small machine that may end up running your notes, local models, file automations, dashboards, and lab housekeeping.
Buy it like infrastructure.
Start with the Mac Mini's real ports. Put displays on the map. Give the fastest drive a clean path. Decide whether Ethernet should be built in, direct, or docked. Keep convenience devices away from the premium connection. Use known-good cables.
Then buy the smallest dock that makes the whole desk calmer.
That is the TokenByte version of cable management: not prettier wires for a photo, but fewer dumb failures when the lab is finally useful.
Found something that needs correcting? Tell the editor. Research, estimates, and hands-on measurements should be identified in the article. Read our affiliate disclosure.